The Workshop and the Storefront
My wife is a jewelry designer. She has a workshop where she spends much of her time hammering, soldering, tinkering, shaping, sawing, buffing, polishing, experimenting, and iterating in order to produce gorgeous designs from a slew of shiny metal materials.
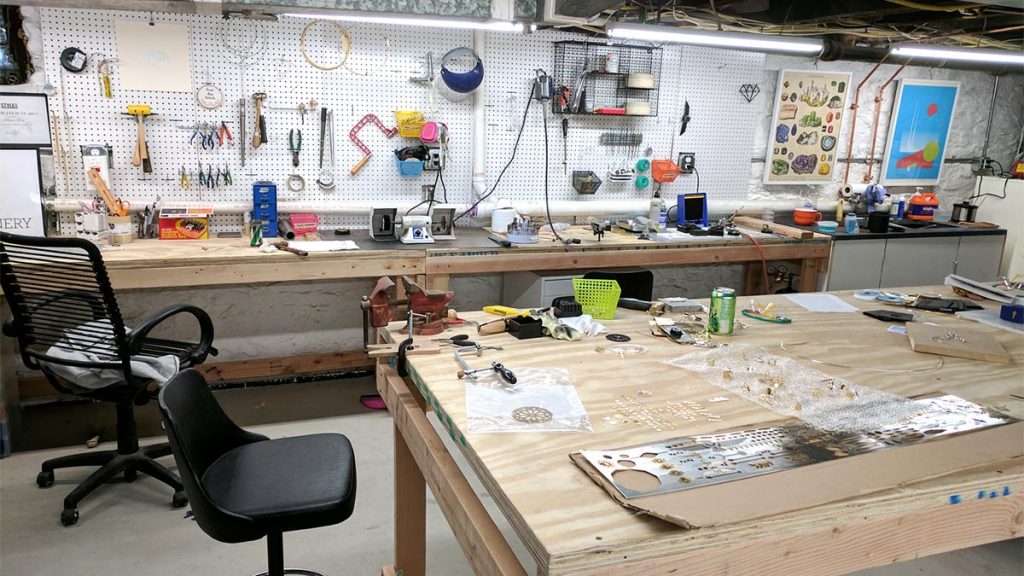
Frost Finery’s workshop in Pittsburgh
Her workshop environment is designed for her to be productive and creative: her tools are easily accessible, her materials are organized, the lighting is a bit too bright so she can see what she’s working on, and she has room to spread stuff around. Her workshop isn’t the cleanest place in the world, and that’s ok. She’s able to put her head down and do her best work.

However, her workshop is a much different environment than the environments she uses to present and sell her work to her customers. She has a website, Etsy shop, Instagram account, sells her work at events, and stocks her work in brick-and-mortar boutiques and online stores.
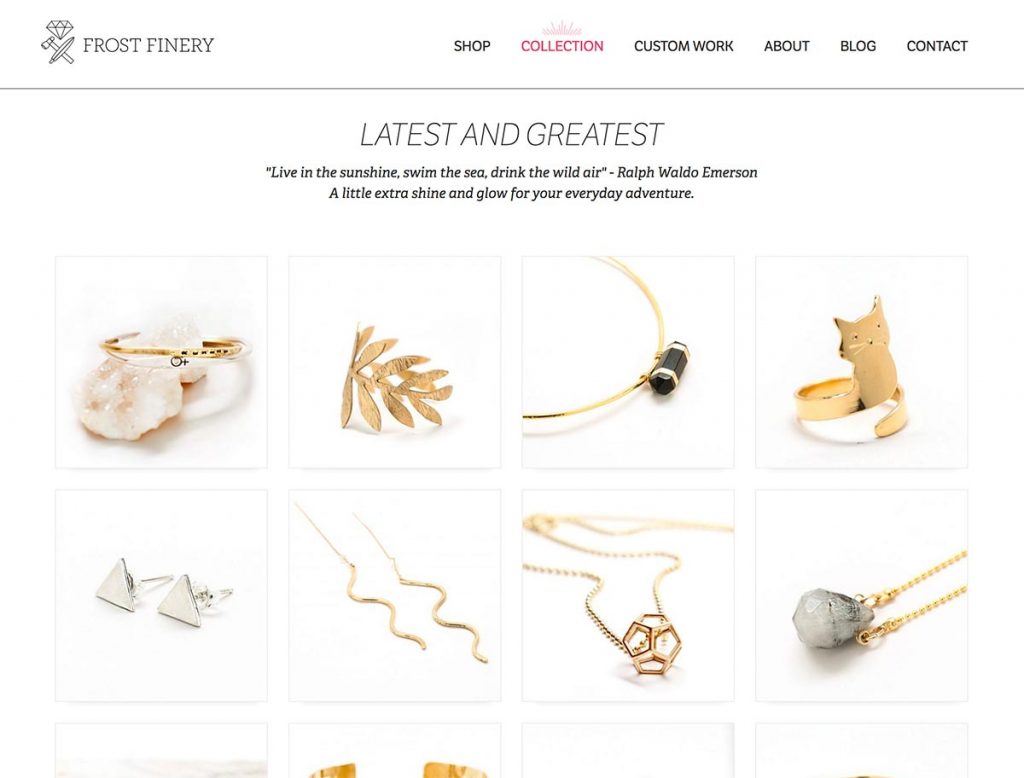
Frost Finery jewelry on display on the website
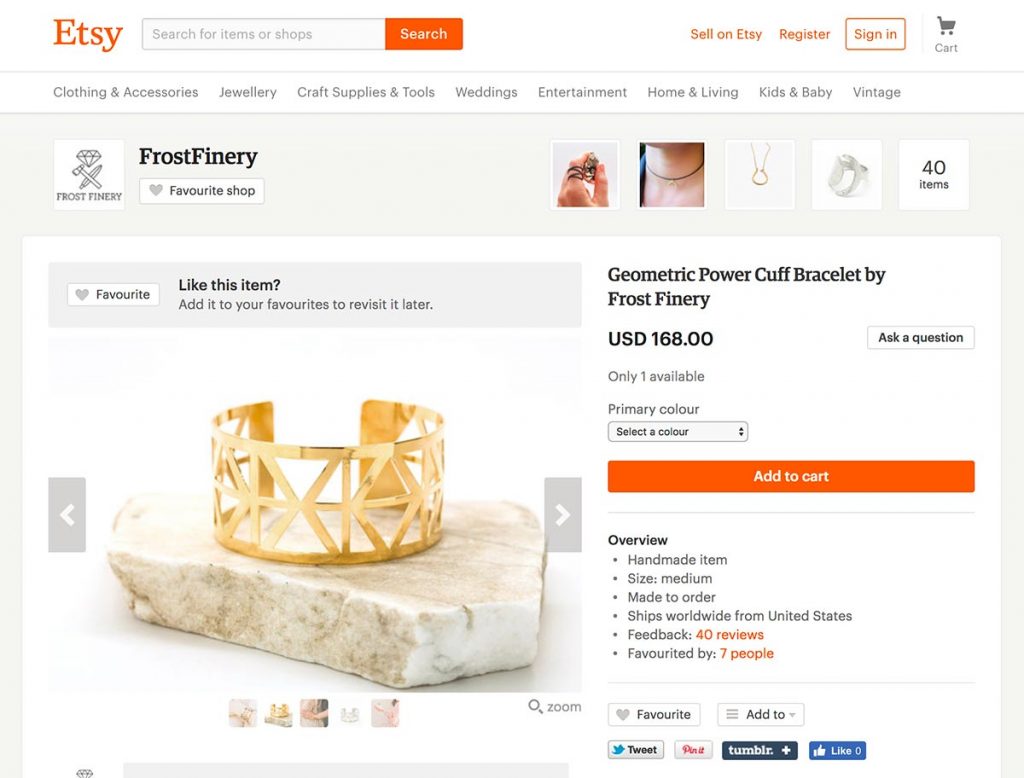
Frost Finery on Etsy

Frost Finery on Instagram
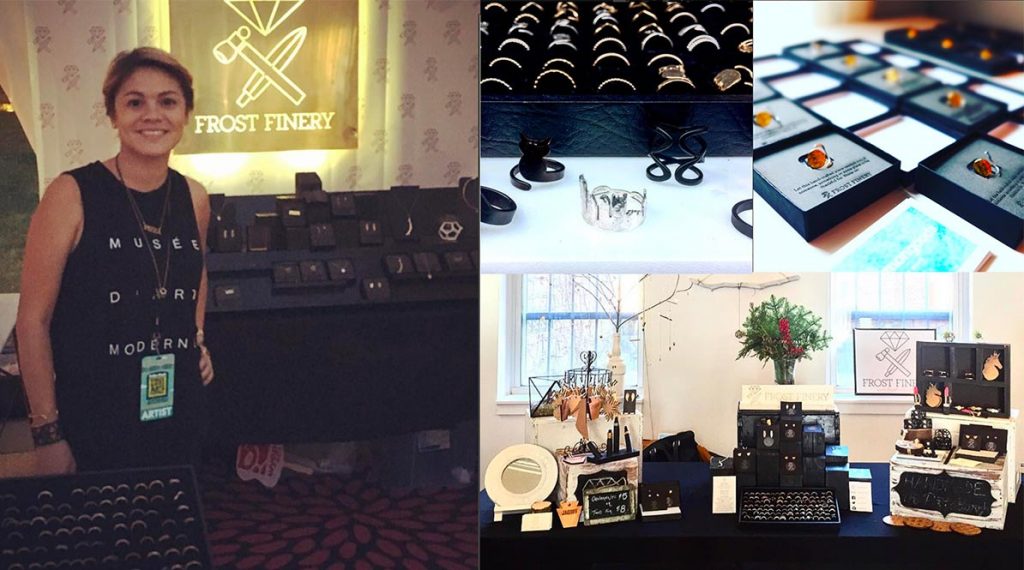
Frost Finery sells jewelry at arts festivals and events
These environments serve as storefronts that allow her to showcase her finished pieces in an attractive display alongside helpful information about the products, her process, and relevant purchasing info. These storefront environments are designed to provide context that helps potential customers decide to buy her work.
The Design System Workshop and Storefront
There are over 100 tools for helping creating UI patterns, pattern libraries, and style guides. These tools all do different things, use different technologies, and solve different parts of the design system puzzle in different ways. We tend to clump these tools together and compare them in an apples-to-apples way, which is probably wrong to do but is also understandable—these are still early days and we’re still figuring all this design system stuff out.
My work with frequent collaborators Josh Clark and Dan Mall has us creating and guiding design systems and style guides with large organizations. We’ve landed on some solutions that sets our clients and teams up for success, which involves setting up both the design system workshop and the storefront.
The design/dev environment is the workshop
It’s funny, I’ve been helping create Pattern Lab since 2013 and until recently I never felt like I had a good way to describe exactly what it is. I’ve written about what Pattern Lab is and how it can help, but it’s always been conflated with style guide and documentation tools.
While Pattern Lab shares some qualities with style guides (for instance, it shows code snippets and you can add pattern documentation), the environment is really designed for teams to effectively build and work with UI components: the navigation across the top is small and unobtrusive, there are viewport resizing tools to stress-test UI components and pages, we’re able to organize components in a way that makes sense to us as creators (such as using the atomic design methodology), and we can design with dynamic data to ensure patterns are robust, resilient, and serve the needs of the organization’s applications. Like my wife’s jewelry workshop, the environment is designed for the design system team to be productive and creative.
A recent design system we built for a large enterprise, we had to create data table patterns that were able to handle a whole slew of different use cases. Working in Pattern Lab we were able to create table patterns, include them in other components and templates, and pour in many different types of data and content to ensure the patterns held up against many different use cases.
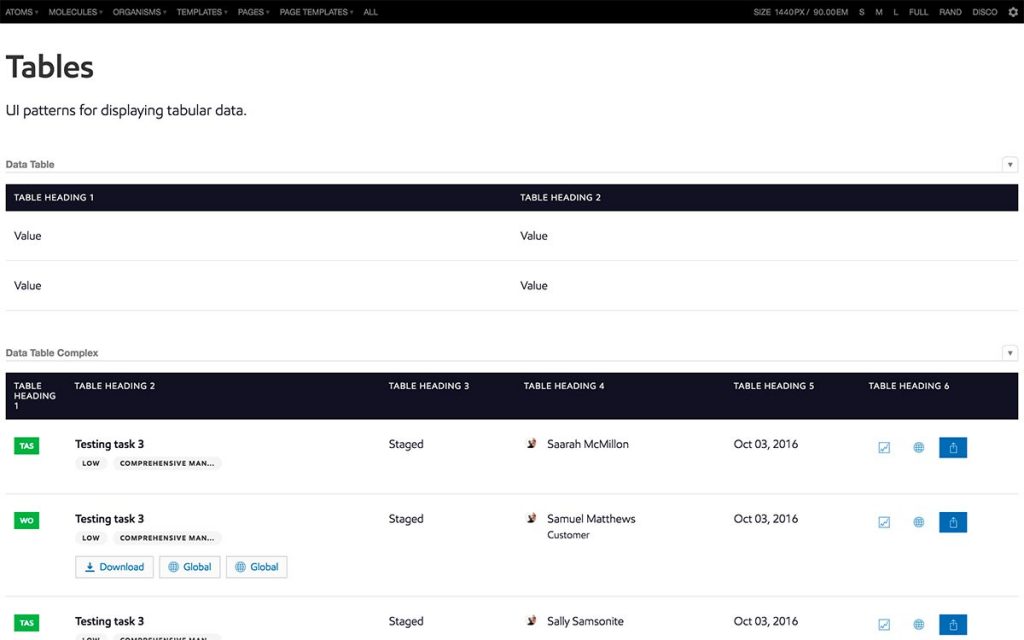
Data table patterns presented inside Pattern Lab
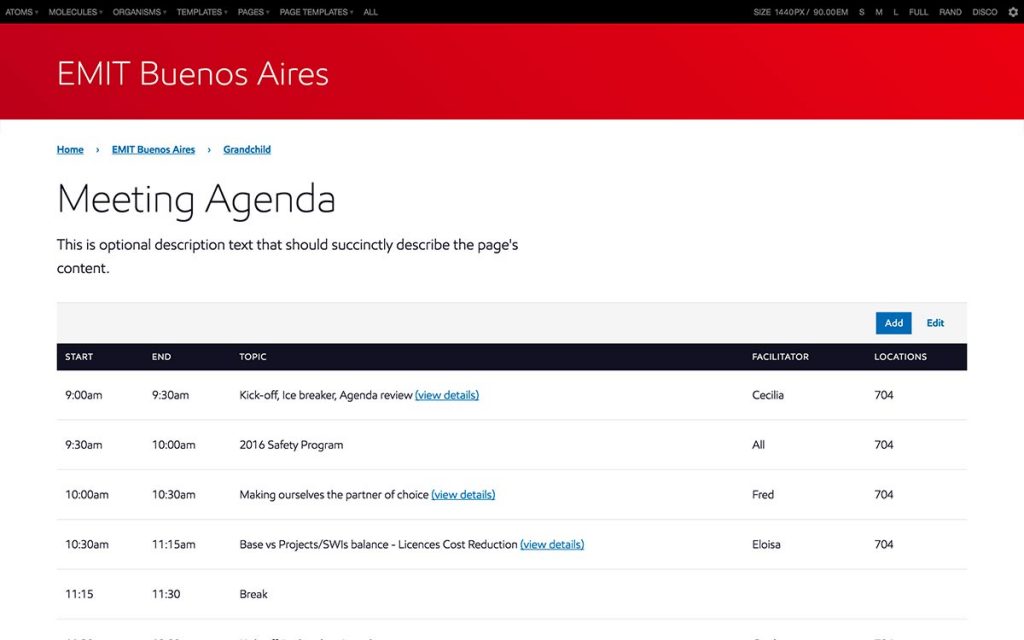
A data table pattern applied to a pilot project page
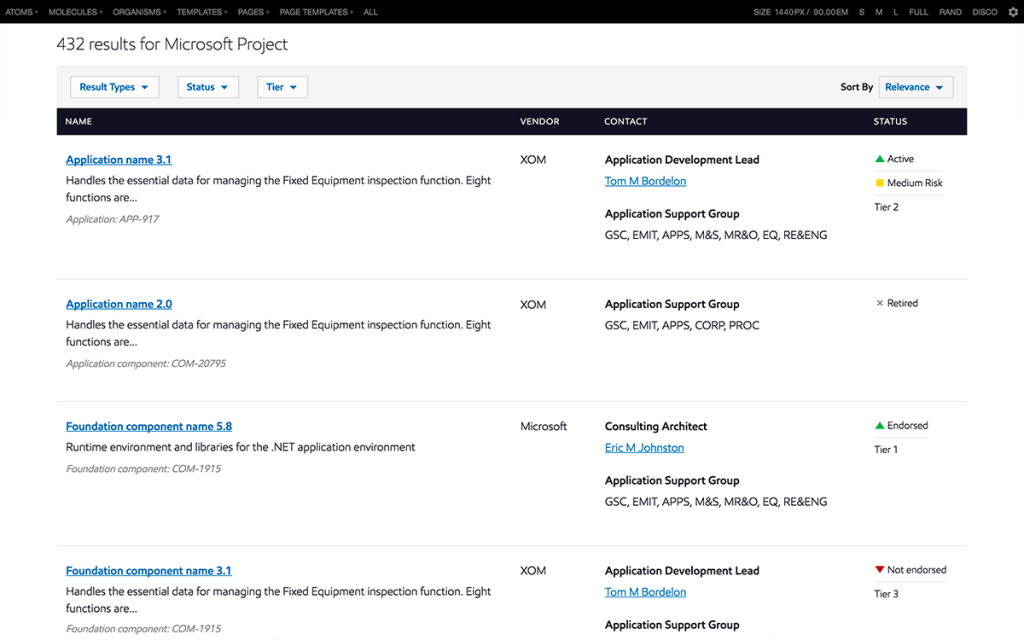
A data table pattern with a lot of complex content displayed within it
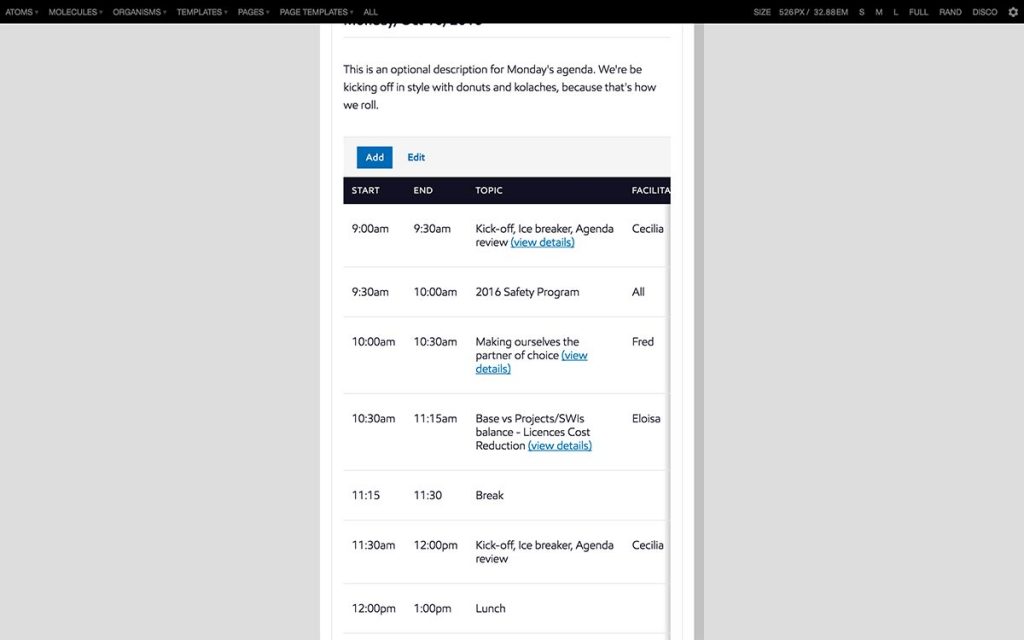
Pattern Lab’s viewport tools allow us to ensure our patterns are flexible and resilient
I’m biased towards Pattern Lab simply because I’m able to work effectively in the tool. But of course there’s nothing stopping your team from working in another design and dev environment that allows you to effectively create, modify, and stress test UI components. Find your workshop and have fun.
The style guide is the storefront
I tend to define a design system as all the things that go into doing design at an organization. That means the design system can include things like principles, high-level guidelines (UX conventions, UI code conventions, etc), UI components, documentation, tools, resources, and more. I tend to define a style guide as the happy home where all that design system stuff lives.
A style guide is the storefront where all the ingredients of the design system are put out on the shelves. The style guide storefront is designed for a different context than the design/dev environment workshop. Rather than being a tool for only the design systems team to make use of, the style guide communicates the design system to the whole organization. That means the style guide audience should be cross-disciplinary, since a design system can help create a shared vocabulary between all the people who are responsible for the success of the products at the organization. The style guide should provide information helpful for both makers and users of the design system, and should be used as a vehicle to continuously sell the value of the design system to the organization.
With those considerations in mind, let’s look at how we presented our data tables in the style guide.
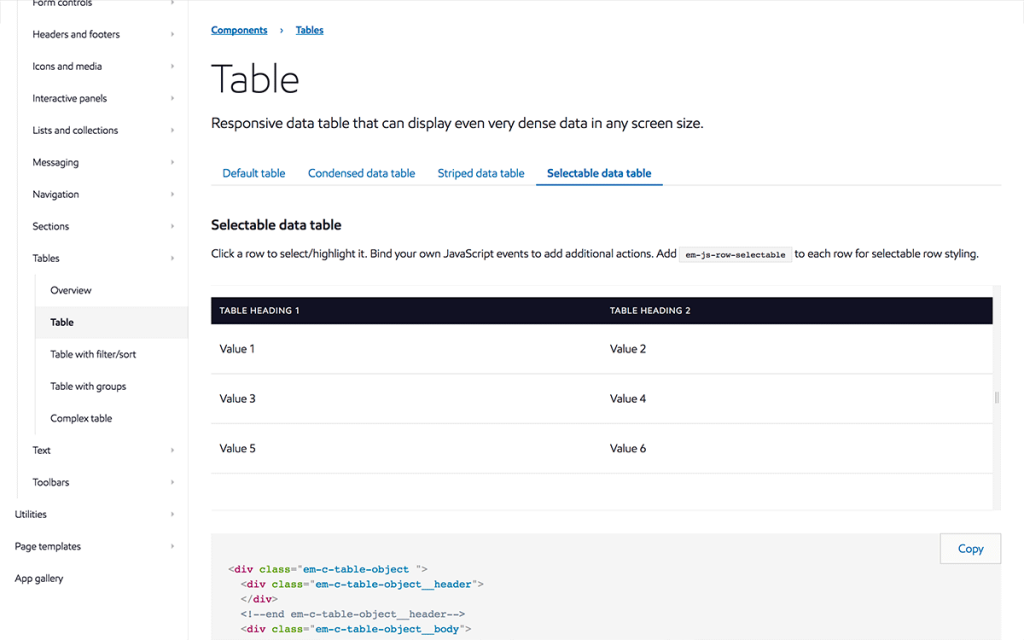
The data table component displayed in the style guide shows a title, short description, live examples, variations of the pattern, code snippets, and more.
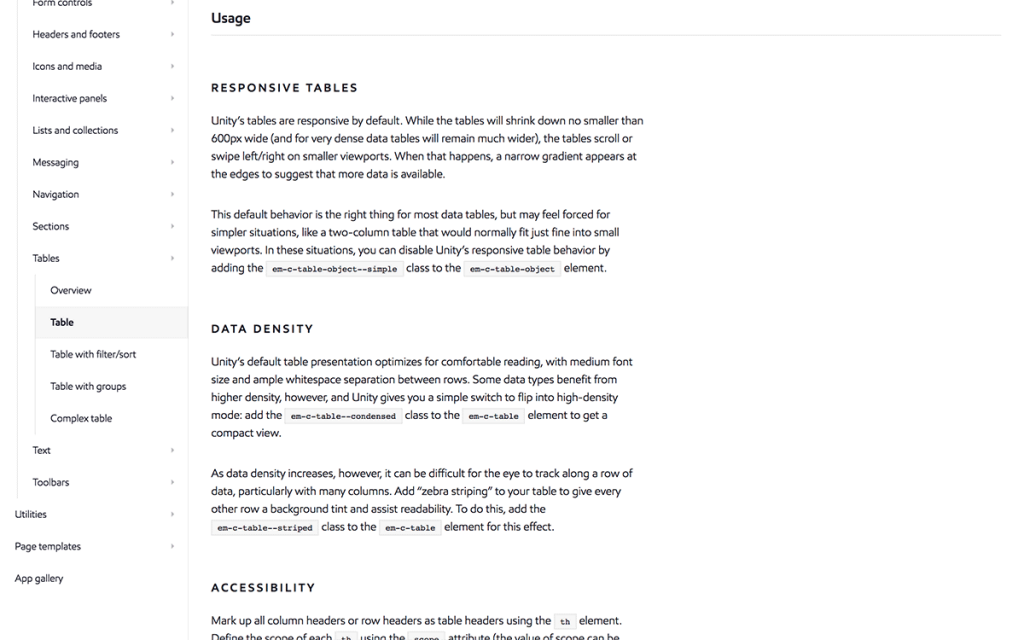
The data table usage guidelines are helpful for users of the design system and provides context for why things are designed the way they are.
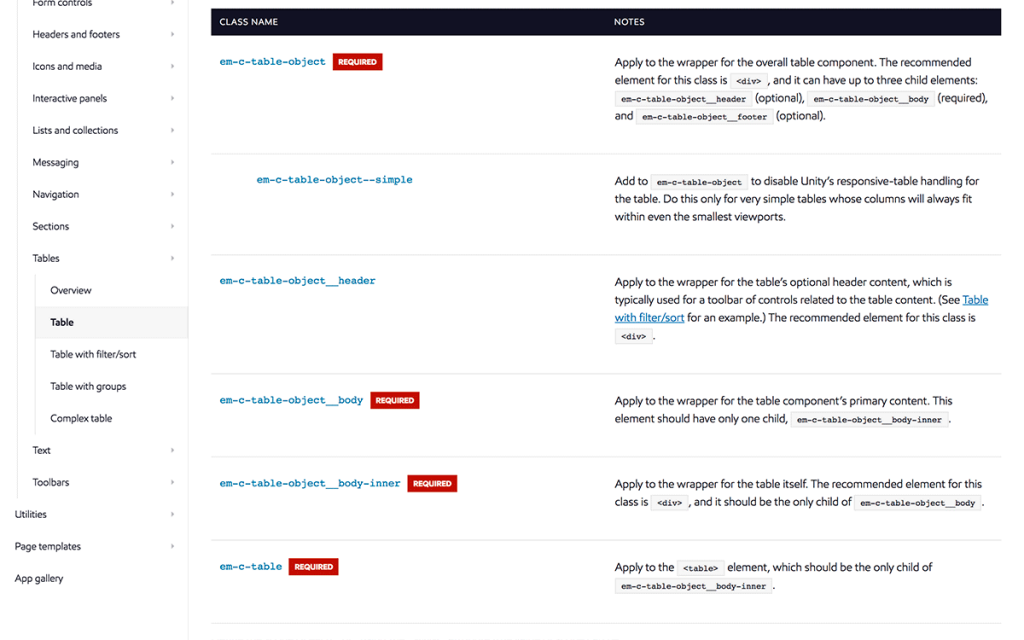
The style guide can lay out the nitty gritty anatomy of each component
The display of the components within the style guide serves a different purpose than the display of the components within the dev environment. Rather than purely displaying the “what”, the style guide provides an opportunity to explain the “why”, “how”, “where”, and “who” as well.
Introducing Style Guide Guide
Our efforts to create effective style guide storefronts for our clients led to us create a style guide boilerplate called Style Guide Guide. It serves as a helpful starter to create your own custom style guide.
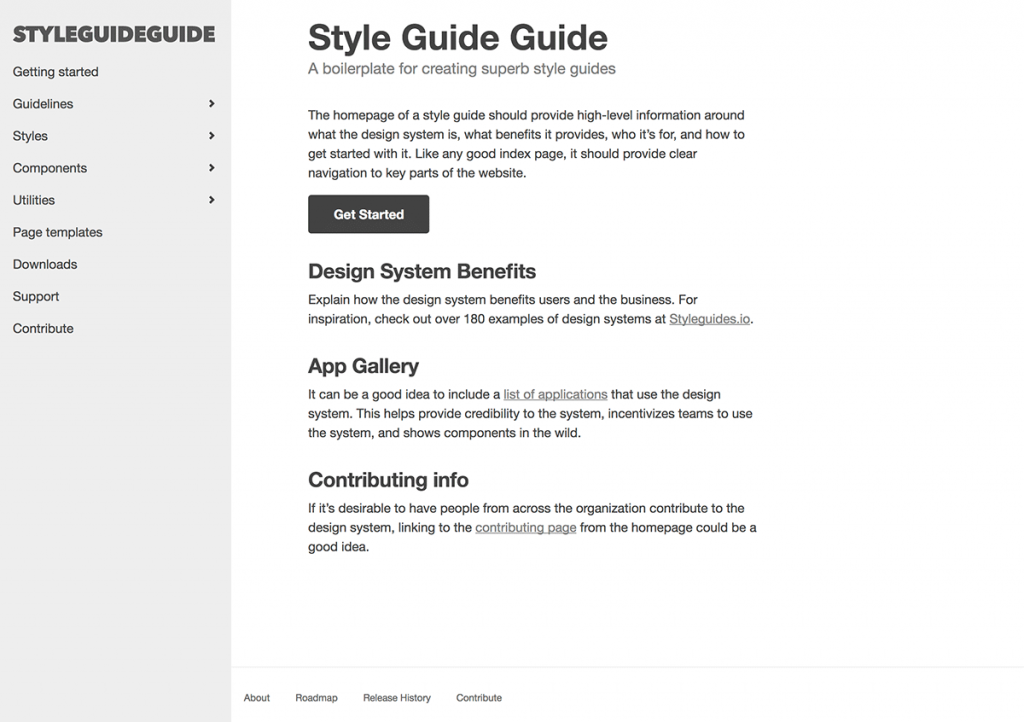
Style Guide Guide is a style guide boilerplate to help your team create your own custom style guide for your design system. See it in action or grab the code.
It’s built on Jekyll, which we’ve found helpful for getting more people to be able to contribute to the style guide’s documentation. By separating the workshop and the storefront, more people are able to participate in the design system without having to worry about crawling into code to update documentation and potentially breaking the design system’s codebase.
If you’re interested in checking out Style Guide Guide, you can see it in action or grab the code. Feel free to pull it down, customize the design, populate it with your principles, guidelines, and documentation, and transform it into a happy home for your design system’s ingredients to live.
Getting from the workshop to the storefront
Products make their way from a workshop to a storefront often by way of a delivery truck that drops off the goods to a store’s inventory room. From there, the store owner can decide which products to put out on the shelf, how to arrange them properly, and what information to display alongside the products to sell the goods.
So that’s how we’re thinking about our dev environment and style guide. Here’s what that process looks like:
1. Design and dev work happens inside of Pattern Lab
New patterns get added, bugs get fixed, or some other changes happen to the design system’s components.
2. Move appropriate assets from Pattern Lab into the style guide
When the design and dev work in Pattern Lab is complete, we can then move the necessary files over to the style guide. Pattern Lab and the style guide project directories live adjacent to one another (and are independently managed as their own git repositories), like so:
pattern-lab/
style-guide/
Once the design work is done in Pattern Lab, we run a Grunt or Gulp task to export the appropriate files into the style guide directory.
gulp style-guide-export

What get beamed over into the style guide? The answer to that will no doubt depend on how you’re setting up your system. In our experience, we move over the following:
- Compiled component HTML files, to be displayed in an iframe within the style guide and for code snippet display
- A production-level, minified CSS file that powers the styles of the style guide site (the style guide often dogfoods the design system!)
- Production-ready JS that will be used by the components in use within the style guide
- SVG sprite for icons
- Image files that are required by the system
You can see some pseudo-code for a Gulpfile here, which lives inside the Gulpfile that powers the Pattern Lab build process.
3. Rebuild the style guide
With the new assets in place in the style guide directory, the style guide can be rebuilt. Navigate to the style guide directory and run the following:
jekyll serve
Any changes to the components, CSS, JavaScript, images, or icons should be reflected in the style guide.
To each their own
Again, there are tons of techniques and tools for creating successful design systems and style guides. We’ve found the workflow of separating the dev environment workshop from the style guide storefront to be helpful, and it provides a lot of benefits for design system makers and users alike. But of course each organization and environment is different. Maybe you can house your workshop and storefront in the same place. Maybe you don’t want to use Pattern Lab. Maybe you can’t use Jekyll and need to use another tool itself. That’s perfectly fine. Just be sure to set up an environment that allows design system makers to be productive and effective, while also creating an environment that effectively communicates the design system to your organization. Have fun!