A Design System Governance Process
You can have a comprehensive design system that contains a slew of well-structured components, thorough documentation, thoughtful guidelines, and a well-considered design language. But if a design system user can’t get done what they’re trying to get done, the whole system risks obsolescence.
Product teams’ primary concern is getting work out the door, not to uphold the integrity of the design system. Teams get creative and will find ways of getting things done, which may involve hacking styles, creating a slew of one-off components, or abandoning the design system altogether. As Jeff Goldblum quips in Jurassic Park, “Life, uh, finds a way.”
This is why it is so incredibly important for the makers of the design system to establish a crystal-clear governance process that helps users understand what to do when:
- They can’t find a component that does what they need
- A design system component gets them 90% of the way there, but not 100%
- They have questions or concerns about the design system
In our design system work with large organizations, we’ve found that a design system governance process is one of the most important ingredients of a healthy design system that stands the test of time.
When the brilliant Inayaili de León Persson was working at Canonical on their Vanilla design system, she published a blog post that linked to an amazing flow chart that detailed how a new component makes its way into their system.
In my own client work over the last few years, I’ve been building upon Yaili’s general structure and adding more stages of the governance process to the mix. I’ve mapped out the governance process in this chart, and this post will detail each step in the process. Update: I’ve also recreated this chart in Mural and have also published a community FigJam to remix.
I’ve also recorded a video walking through the governance process, so feel free to give it a spin.
Now onto the nitty gritty!
Step 1: Product teams use the design system to help design and build new work
Teams should default to using the design system’s components to help create new product work.
The best case scenario is that a team comes to the library, finds the component they need and finds that it fulfills all their requirements. They plug in the component and carry on with more pressing matters. Hooray for best case scenarios!
Step 2: What happens when the design system’s components don’t exist or don’t fulfill requirements?
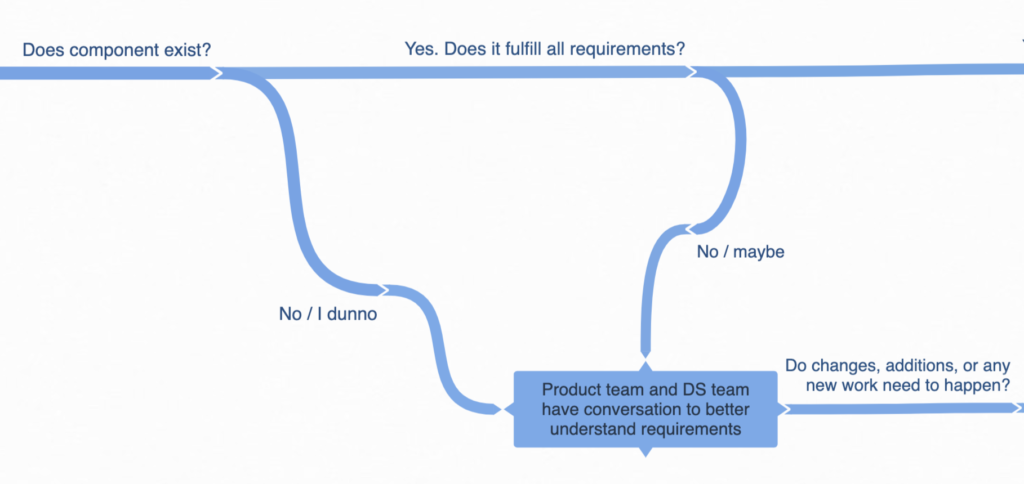
If the team comes to the design system and doesn’t find the component they need, if an existing component doesn’t fulfill all the requirements, or if they’re just not sure if the system has what they need, the first step is for the product team to reach out to the design system team via Slack, issue trackers (Github, Jira, etc), or other channel (Note: the design system team should establish clear support protocol).
The teams will have a conversation to better understand the issue, and then determine whether or not new work needs to happen. Often the design system team can help guide the product team to an existing solution that meets the requirements. Hooray for conversation!
Step 3: If new work is needed, is it a snowflake or part of the design system?

If the teams agree that new work needs to happen, the first thing that needs sorted is whether or not the the work is:
- A “snowflake”, which is a one-off component that only really pertains to one specific product or use case (such as a mortgage calculator, a super intricate and specific data visualization, or any component that feels especially challenging to abstract into a general-use component)
- Part of the design system, which is a component or variation that is part of library that serves all products (such as adding a breadcrumbs component or perhaps adding an “x” button to a card component in order to make it dismissable)
If the teams decide the work is a snowflake, the work will be added to the specific product team’s backlog in accordance with the design system’s snowflake guidelines (Note: the design system team should establish guidelines for managing snowflakes to be able to track components and make refactoring into the design system easier down the road). If the teams determine the work is part of the design system, the work will be added to the design system backlog capturing the work to be done.
The teams will then prioritize the work to be done. If the work is a snowflake, it’s likely that the product team will own and execute the work. But if it’s design system work, the team who take the lead on the initial explorations depends on a number of factors, including priority, urgency, and available resources.
Step 4: Prototype initial concept
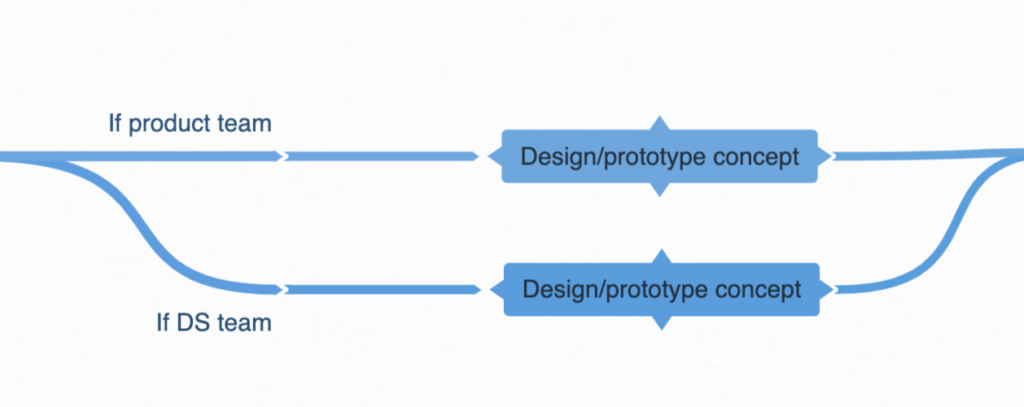
Once the teams determine who will take the lead on the initial concept, that team will produce the initial concepts for the work. That may take the form of a wireframe, napkin sketch, comp, in-browser prototype, or any other artifact that quickly and clearly articulates the use case and defines the work to be done.
Step 5: Review initial concept
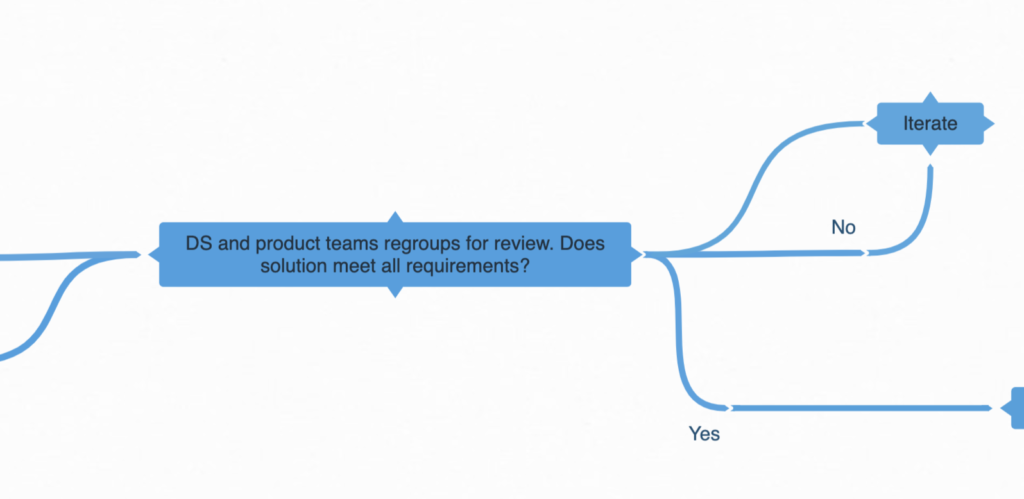
The design system team and product team will regroup to review the concept and determine whether the concept meets all requirements. If things are missing, the team will iterate over the concept and the teams will continue reviewing until the requirements are met.
Step 6: Formal design system design/dev & testing process
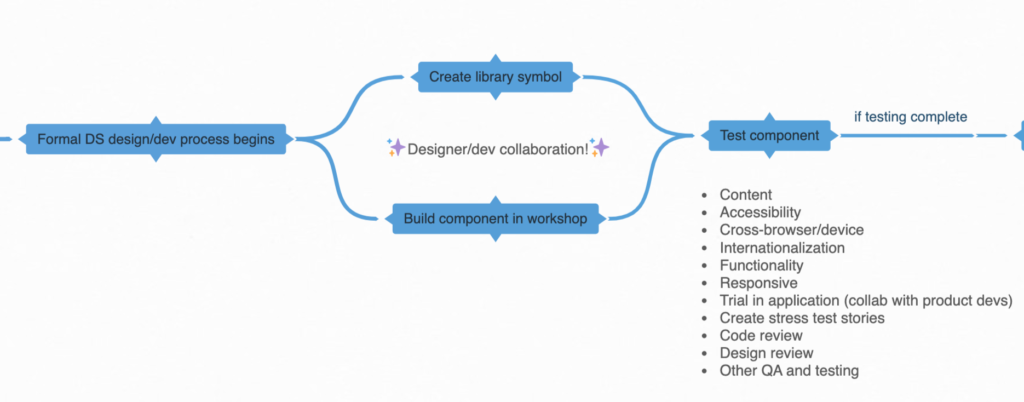
With the concept approved by both teams, the design system team will pick up the work as part of the design system product roadmap.
This process involves representing the new component or variation in static design tools (such as Sketch or Figma) as well as building the component in the design system’s frontend workshop environment in a feature branch (for example, feature/dismissable-card). The component will follow the design system’s code guidelines and will consider reuse, flexibility, composability, accessibility, performance, and other best practices.
When the component is built, testing will ensue across the following areas:
- Content – can this component or variation handle a variety of content situations (such as lengthy or internationalized text)?
- Accessibility – does this component meet or exceed accessibility requirements and follow accessibility guidelines?
- Cross-browser/device – test across supported browsers and devices
- Responsive – test across the entire resolution spectrum to ensure proper display on any screen size
- Functionality – unit testing for functionality
- Create stress test examples in the workshop to capture common, edge, and stress scenarios
- Internal code review – ensure component code meets design system coding standards
- Internal design review – ensure work adheres to the design language and meets all design requirements
- Trial in applications – It may be helpful to collaborate with user devs to test a pre-release of the component in applications to ensure things work properly, API endpoints are intuitive, etc.
- Any other internal QA and testing
Step 7: Final review with product team
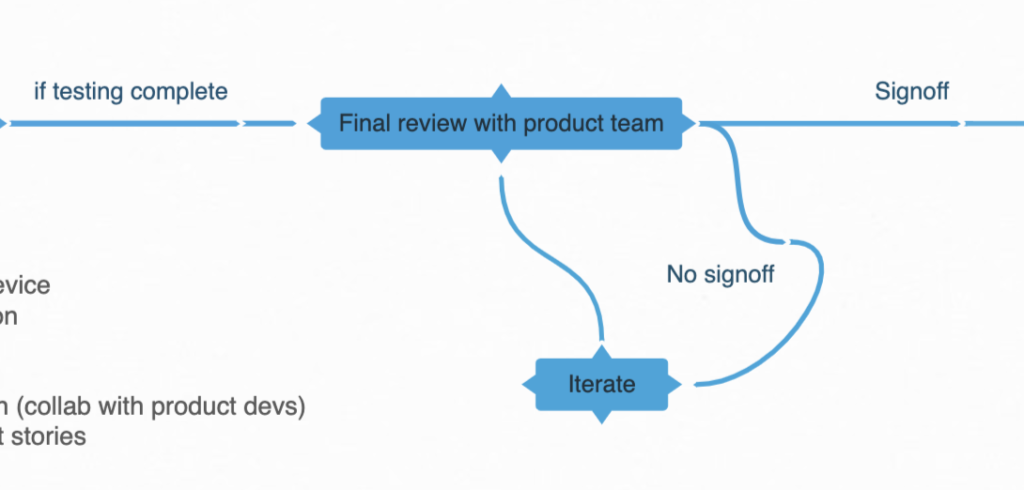
Since the concept, design, or execution may have shifted due to the work detailed in the previous step, the product team and design system team will meet for a final review. If the product team doesn’t approve the work, iteration will happen and the teams will regroup until the product team signs off on the work.
Step 8: Documentation and stage for release
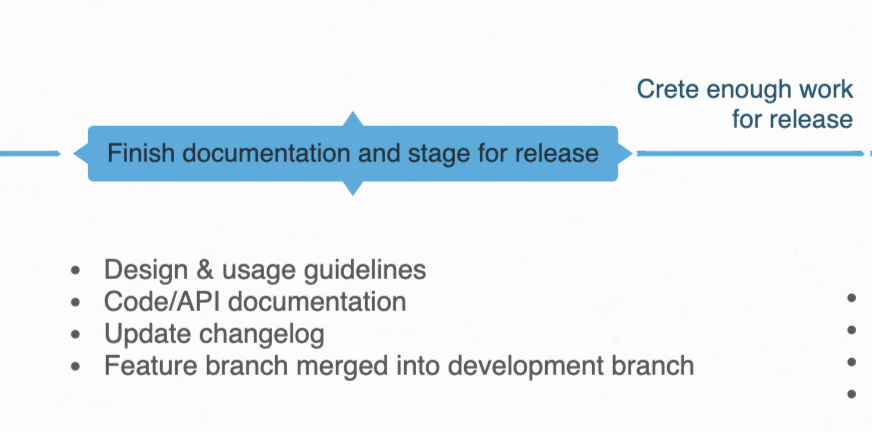
Once signoff happens, the component/variation will be documented on the style guide website, code and API documentation will be finalized, the changelog will be updated, and the feature branch is merged into the development branch, which means it is staged for the next release.
Step 9: New design system release
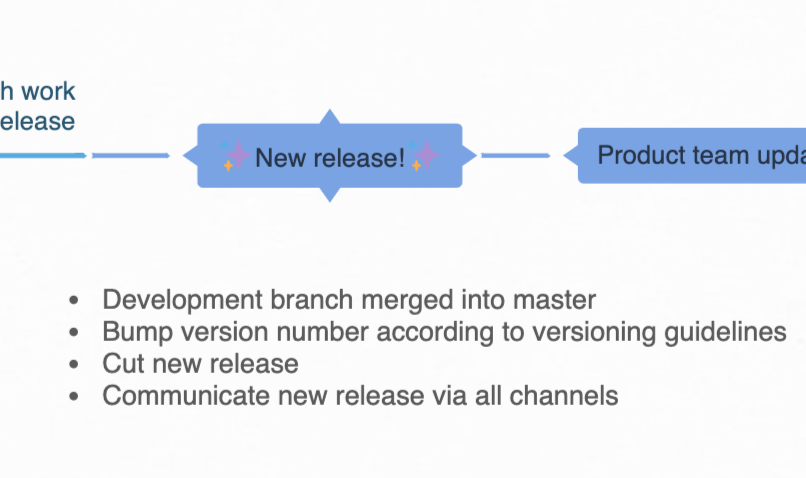
When it’s time to create a new release (Note: teams should establish a cadence for releasing design systems; see this great post by Nathan Curtis on the topic), a new version of the design system is released containing the new work (along with any other new work) following the semantic versioning guidelines outlined by the system. The design team communicates the new release via all appropriate channels (Note: the design system team should determine what communication channels are used to publicize a new release).
Step 10: Product team adoption and QA process
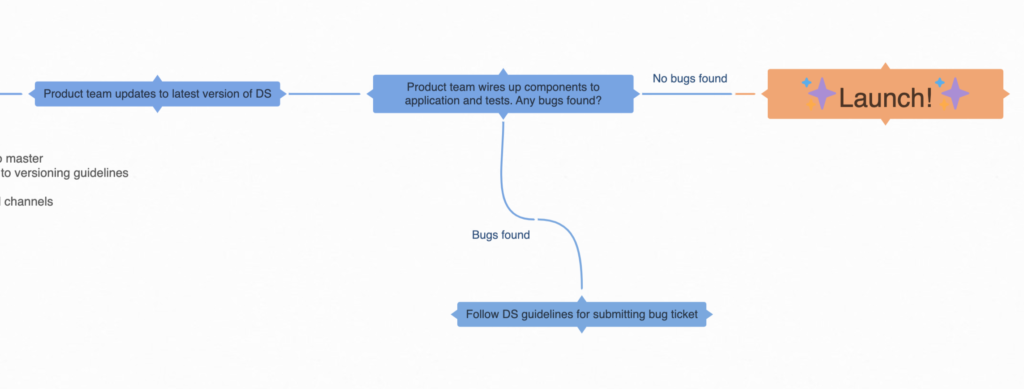
The product team pulls in the new version of the design system into their application environment and tests the new work. If questions or bugs emerge, follow the support process to handle any questions or issues (Note: again the design system team should establish clear support guidelines detailing how to handle bugs).
If no bugs are found, the work is staged for the next release of the application and the new component or variation makes its way into the live application!
Adapt and evolve
WHEW. So that’s a pretty lengthy process to get from “I don’t see the component I need” to “that new component is now launched in our product”. But we’ve found that spelling things out in this granular way helps build trust between product teams and the design system team, and reduces the anxiety around how new work gets created.
It’s worth noting the title of this post is “A Design System Governance Process”, not “The Design System Governance Process”. While this workflow can be a great conversation starter, it’s absolutely essential to establish a governance process that best fits your organization. For instance, we’re significantly altering this process for one of my clients in order to do a lot more QA work with product devs before we ever release a new version of the design system. Establish your own governance model, and revisit it from time to time, especially if you find yourselves with frustrated users on your hands. That’s likely a sign that the process you’ve established isn’t holding up. That’s ok (this is all a learning process!), but iterate and improve until you land in a good place.
it’s also worth stating that this process can be established well before the design system even exists! I’ve found that walking through this process with clients who are early on in their design system journey is beneficial at flagging who the key players are, what tools they should be looking into, how they want to structure teams and processes, and so on.
Establishing a design system governance process is perhaps one of the most important things you can do to prevent entropy from taking over your design system. Wishing you the best (long-term) design system success!
Special thanks to Inayaili de León Persson for her amazing work, blog post, and flow chart
